I. Adding Widget to Webpage
1. Log in to the Botsplash Platform
- Use your Administrator credentials to log in at app.botsplash.com
2. Whitelist your website/domain
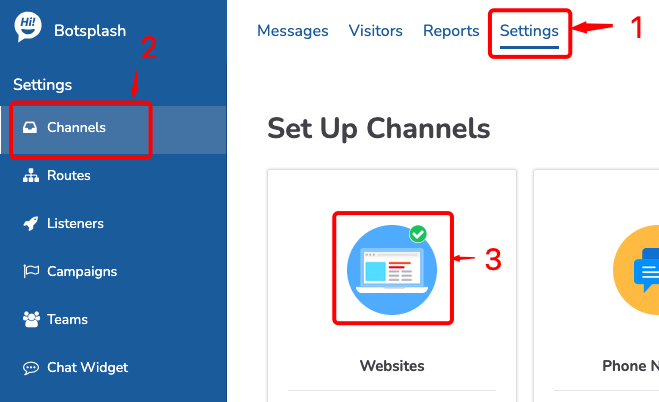
- From the top navigation bar, click on Settings.
- Once in Settings, navigate to the Channels page.
- Click on the Websites icon to add new website
- Add your website domain or URL, give friendly name and click "Add Website"

3. Copy the Chat Widget Script
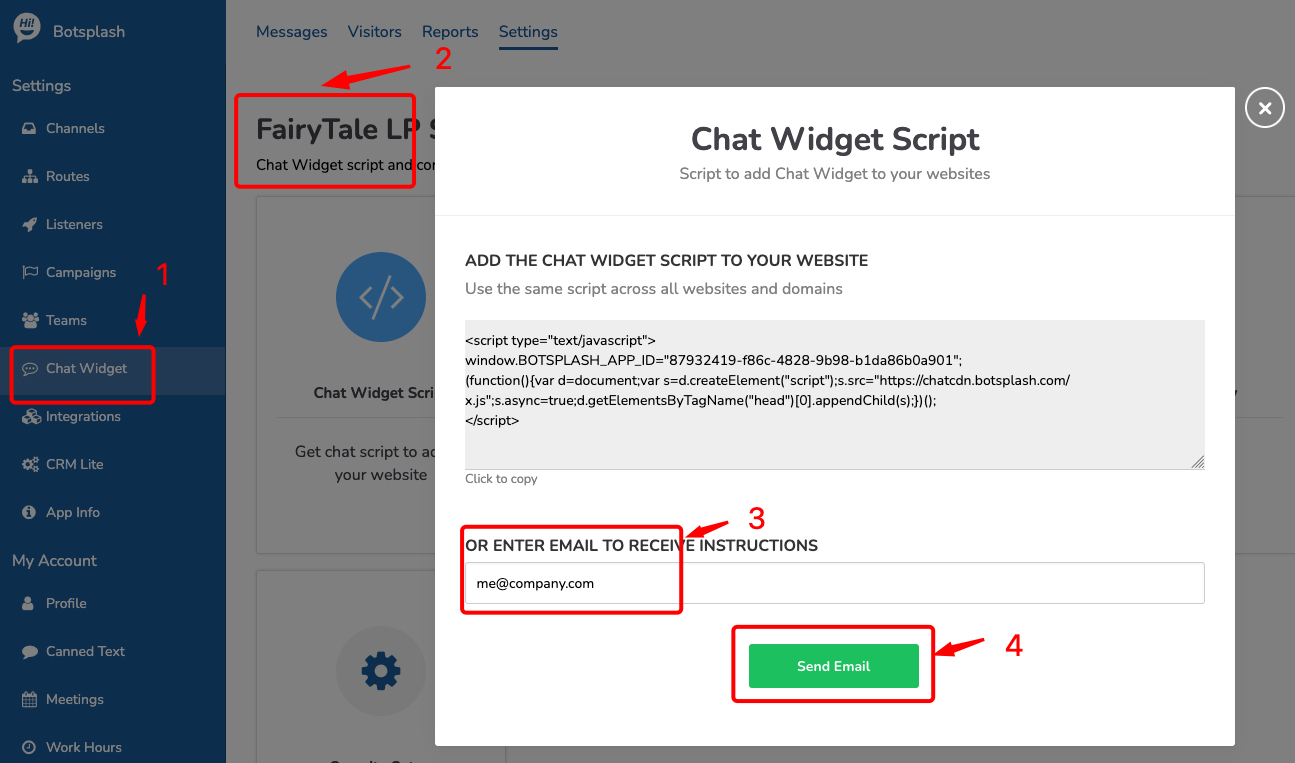
- In the left-hand menu, select Chat Widget.
- Find the Copy Chat Widget script button or box and click it to copy the widget’s script snippet.

4. Add the Script to Your Website
- Open your website’s HTML file.
- Paste the script just before the closing
</body>tag on the pages where you want the chat widget to appear. - Save and publish/upload your changes.
5. (Optional) Email the Script to Yourself
- Select the desired Chat Widget configuration from the list (if there are multiple).
- Click on Chat Widget Script.
- Enter your email address and click Send Email to receive a copy of the script in your inbox.
II. Setup to open Chat widget on button click:
After the chat script is on your webpage, you can begin customizing it. To prompt the chat widget to open upon the click of a button, we have a few script examples for different platforms.
HTML Page:
f24c30ff-9dde-4b30-a47c-c4acf4cab30d: This is your account’s ID found in the chat widget script from the first part of this article. It will not match this example ID.
III. Pre-populate Chat Widget with visitor data
Below are the instructions to send information collected on your site into the Chat Widget.
<script>
window.BOTSPLASH_APP_PARAMS =  {
  "routeKey": "visitor_quick_chat",
  "visitor": {
    "firstName": "VISITOR_FIRST_NAME",
    "lastName": "VISITOR_LAST_NAME",
    "email": "VISITOR_EMAIL",
    "phoneNumber": "VISITOR_PHONE",
    "state": "VISITOR_STATE",
    "zipCode": "VISITOR_ZIPCODE",
    "custom": {
      "loanpurpose": "VISITOR_LOAN_PURPOSE"
    }
  }
}
</script>
Followed by the Chat Widget Script:
<script type="text/javascript">
window.BOTSPLASH_APP_ID="f24c30ff-9dde-4b30-a47c-c4acf4cab30d";
(function(){d=document;s=d.createElement("script");s.src="https://chatcdn.botsplash.com/x.js";s.async=true;d.getElementsByTagName("head")[0].appendChild(s);})();
</script>
Note: For secure transfer of visitor information or other parameters, please contact Botsplash to encrypt the payload with JWT keys.
IV. Customize Chat Widget Theme and Behaviors
In Settings --> Chat Widget, you can customize many aspects of your chat widget.
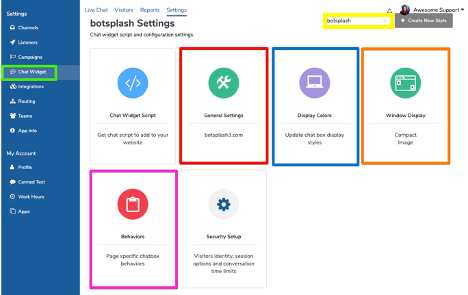
The yellow rectangle indicates where you can create different styles of chat widgets. This allows a different styled widget for different landing pages to ensure branding consistency.
General Settings:
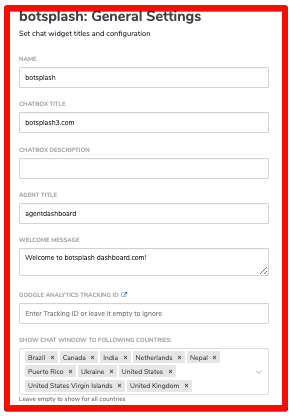
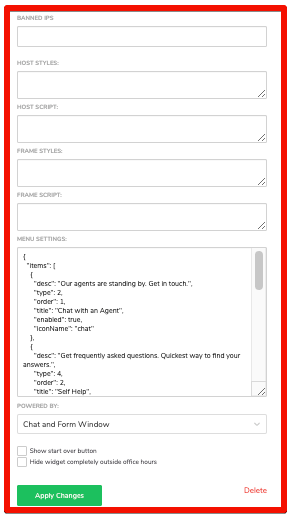
General settings(red rectangle) will open the general options of customization for the chat widget, including the name, title, description, welcome message, etc. There are also ways to segment geographically and ban IP addresses.
Display Colors
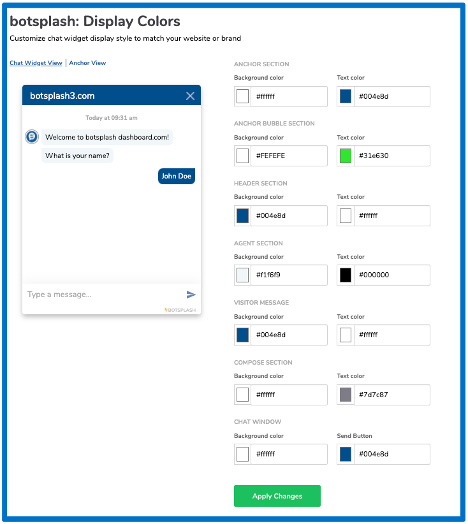
In the display colors menu, you can change the look of your chat widget.
Behaviors
Behaviors area way to customize how your chat widget shows up on a website, including whether it only opens on a click, there is a delay in when it is visible, etc.
NOTE: Any changes to these settings will require a 5-10 minute wait before they show up live on your website.